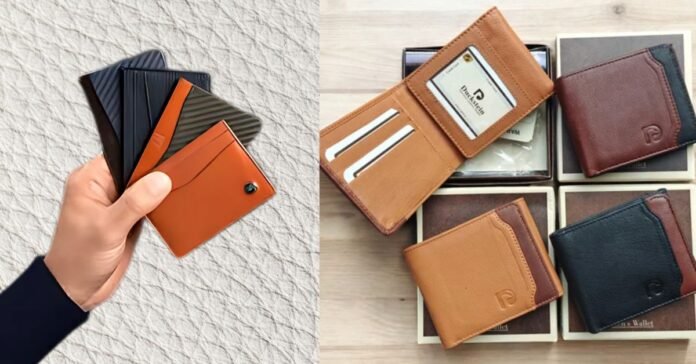
Believe it or not, making a leather wallet is not as hard as it may seem. By knowing how to use various tools and materials, anyone can make an easy and stylish leather wallet. This guide will walk you through the various stages of making a leather wallet, even if you’re inexperienced.
Find The Best Leather For Your Wallet
Buying leather is the first and probably most important step when it comes to wallet making. Remember, full-grain leather is always the best option as it is very strong and also has a marvelous built-in aesthetic. Additionally, top-grain leather is also a great option for new leather craftsmen. Make sure to pick a type that you will be comfortable spending your money on.
Collect Required Tools and Materials
In order to learn how to make a leather wallet, you are going to need some very specific tools. You will need to buy things such as a rotary cutter, a cutting mat, a ruler, leather glue, stitching needles, waxed threads, and edge burnishers, to name a few. Having these beforehand will increase the efficiency and productivity of making the wallet.
Create a Design and Measure Your Wallet Pattern
You should come up with a design before cutting the leather. Making a wallet pattern is essential when learning how to make a leather wallet. Take a piece of paper with you. Make a drawing of the dimensions and the layout of your wallet. The average bifold wallet is 8.5 inches wide and 3.5 inches tall when it’s folded.
Accurate Leather Piece Cutting
Create a leather pattern first, then cut the leather using a rotary cutter or a very sharp knife like surgical blade. Everything in this guide on how to make a leather wallet is about precision. Never ever cut on an unstable surface and make sure you have straight edges, this will make your work look professional.
Sand and Stitch the Edges of The Leather
After cutting the leather, you will need to make the edges using sandpaper or edge beveler more smooth. This step is important in the process of making a wallet and leather edge finishing. A well crafted wallet is finished by these steps.
Mark and Punch Your Stitching Holes
In order to stitch the wallet correctly, you must mark stitching holes evenly. Using a ruler and stitching chisel, make holes that are spaced apart perfectly. This part is essential in learning how to make a leathers wallets. Proper hole placement helps guarantee a strong and tidy stitch, which is crucial. Place holes in specific spots to achieve this outcome.
Stitching is done by hand on Leather Wallets.
Stitching by hand is one of the most important steps in learning how to make a leathers wallets. Use a saddle stitch technique for the best results. You can create a strong and durable stitch with waxed thread and two needles.
Put on Pockets and Attach Any Needed Compartments
Pockets gives additional usage and better appearance at the same time. A cardholder and/or coin pocket needs to be stitched on before the overall assembly of the wallet is done. Sticking the pockets is a necessary step while following this guide on how to make a leathers wallets.
Make the Edges of the Leather Look Nice
Take a wooden burnisher or a sturdy piece of cloth and start burnishing the edges after the stitching is done. this will ensure that it looks neater and does not tear while giving you a more professional look along when learning how to make a leathers wallets. The portion of polishing that you perform will add the most value.
(Optional) Add a Closure or a Snap Button
In cases where a closure is recommended, a snap button or magnetic clasp is recommended for wallets with better security features. Ultimatelly, this step is optional, but it can certainly improve the styling for the wallet. Setting up customized closures is a very good way to change the appearance of your leathers wallets.
Put Leathers Conditioner so the Wallet last Longer
Once completed, put a leathers conditioner on the wallets to maintain high quality. Conditioning ensures that the leathers doesn’t dry up too soon, as well as maintaining overall durability of the leather wallets. You are going to need some reserve care for the leather wallets which has been made.
Test and Finalize Your Leather Wallet
Before using your wallet, check its durability by placing cards and cash inside. Ensuring functionality is the final step in this guide on how to make a leather wallets. If needed, make adjustments to improve the wallet’s usability. Read More: The Best Leather Wallets for Men : Timeless Elegance
FAQs
What is the best leather for making a wallet?
Full-grain leather is the best option because it is durable and develops a beautiful patina over time.
How long does it take to make a leather wallet?
For beginners, making a simple leather wallet can take around 4-6 hours.
Do I need a sewing machine to make a leather wallet?
No, you can hand-stitch your wallet using the saddle stitch technique.


